Whiten your teeth at home using a custom-made whitening tray and safe but efficient whitening gel.

Whiten your teeth at home using a custom-made whitening tray and safe but efficient whitening gel.
Do you want a brighter, whiter smile in the comfort of your own home? When whitening your teeth at home, safety is essential. We provide a safe and effective at-home teeth whitening kit that includes everything you need. You can whiten your teeth whenever it suits you best — whether you’re watching your favorite show or even while you sleep.
At-home whitening is not only practical but also cost-effective in the long run. Once we have made your custom whitening moulds, you can reuse them again and again and only purchase additional whitening gel from our clinic.
At-home whitening is also an excellent way to enhance and maintain the results of an in-office power whitening treatment.
Teeth whitening treatments are not performed on individuals under 18, as tooth development is still ongoing in younger patients. Whitening is also not recommended for pregnant or breastfeeding women. Please note that whitening does not affect prosthetic crowns, veneers, or filling materials.
Teeth whitening cannot be paid for with Edenred, Smartum, or ePassi benefits, as aesthetic treatments are not included in the wellness benefit according to the guidelines of the Finnish Tax Administration.
Print here instructions for at-home whitening
Please note that at-home whitening should always be carried out on a clean and healthy mouth. Any caries and gingivitis should be treated and tartar removed before whitening treatments.
Whiten your teeth in a place where you can spit out any excess whitening product or saliva that builds up in your mouth.
Eat and drink before carrying out at-home whitening, as it is recommended that you avoid acidic foods and those that could cause staining (e.g. blueberries, curry, soya, citrus fruits, cola, red wine, coffee, tea) for two hours after using the whitening moulds.
1. Brush your teeth (without toothpaste) and clean the interdental spaces before starting the whitening.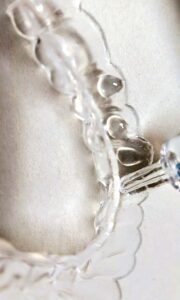
2. Squeeze a small drop of the whitening gel into the whitening mould:
3. Close the cap of the gel dispenser immediately after application.
4. Dry your teeth with paper and place the whitening mould against the dental arch, then press it lightly against your teeth with your finger to spread the gel across the front surfaces of your teeth. If there is excess gel on the gums at the edges of the mould, you can wipe it off with a cotton swab or piece of paper, for example. Try to avoid swallowing the whitening gel.
5. Recommended usage time for whitening gel
6. At the end of the treatment, clean your teeth and the whitening mould with a soft brush using cold water.
7. Store the whitening moulds in a dry place in the case provided with the whitening kit, for later whitening. Make sure that the moulds are airtight and not twisted in the case , so that they maintain their original shape.
8. You can do a new whitening treatment after six months or a year, depending on your needs.
Unable to find the specialist you were looking for? Call our customer service 010 400 3400